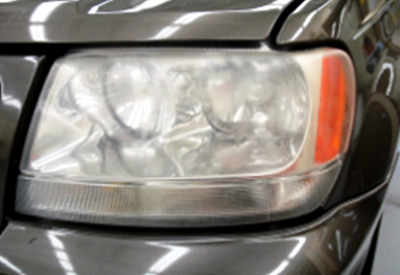
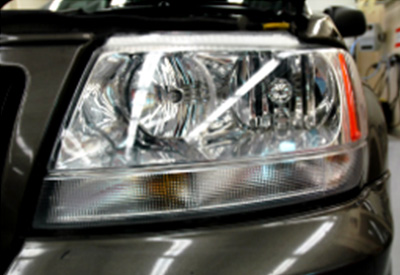
The Car Headlight Lens Restoration products and procedures outlined below are designed to give do-it-yourselfers an easy and affordable way to restore clarity to headlight lenses that have become yellowed, cloudy, or hazed over time. The 3M Auto Advanced Headlight Lens Restoration System can be used to repair hazing on plastic headlight lenses, plastic taillight lenses, emergency light bars, plastic motorcycle lights, plastic trailer lights, plastic snowmobile lights and more. Restoring lens clarity is inexpensive compared to having lenses replaced, and the entire process usually takes under an hour.
Headlight lens restoration procedures below fall into two categories:
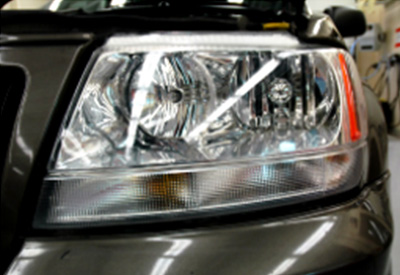
Before
After
Click Below for Step-by-Step Instructions – Car Headlight Lens Restoration
Repairing minor yellowing or haze by hand (no tools required).
Headlight lenses have a UV resistant coating on the outer surface of the lens. Once a lens has been degraded by the sun (UV light) and becomes yellowed or cloudy, it is necessary to remove that yellowed layer in order to improve the clarity of the lens.
With the 3M™ Headlight Restoration Kit 39084 (pictured right) you will sand by hand to remove the yellowed layer from the headlight lens surface and use Rubbing Compound and a foam pad to remove sanding scratches and deliver a clear headlight lens. This procedure is done by hand, no tools required.
The kit includes: 1 Orange Foam Pad with Hookit™ Attachment, 6 sanding discs, 4 finishing discs, 2 refining discs, and 2-1 oz rubbing compound packets. One Kit should be enough to do two headlights on a midsized vehicle. If you have many headlights to do, or have larger headlights, you may want to purchase more than one kit.
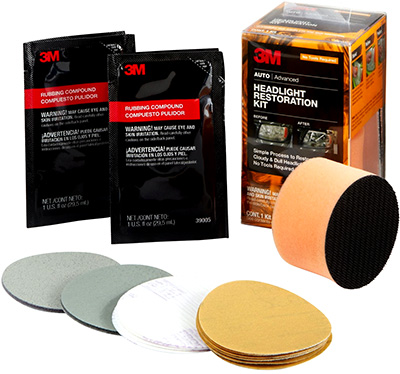
3M Headlight Restoration Kit 39084
Step 1 – Clean Lens, Protect Adjacent Surfaces with Tape
- Clean the lens with soap and water.
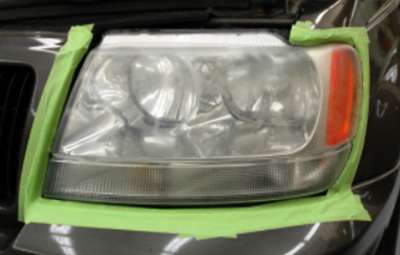
- Protect trim and painted surfaces around the headlight lens with Tape. Damage can occur (scratches) if these surfaces are not protected.
Step 2 – Attach 500 Grit Sandpaper Disc to Pad
- Attach and center a Gold 500 Grit Sandpaper Disc onto the black face of the Orange Foam Pad.
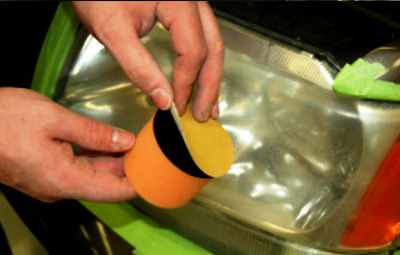
Step 3 – Start Sanding Headlight Lens with 500 Grit Disc
- Using the Orange Foam Pad and Gold 500 Grit Sandpaper Disc start sanding the lens to remove the yellowing and other surface defects.
- Sand in a circular or back-and forth pattern with significant pressure.
- Frequently wipe the sanding disc and headlight lens with a paper towel or cloth to remove the excess sanding dust.
- If the disc is no longer removing material, replace with a new Gold 500 Grit Sandpaper Disc and continue sanding until the yellowed layer on the headlight lens is completely removed.
Please Note: There are a total of six (6) Gold 500 Grit Sandpaper Discs that come with the kit.
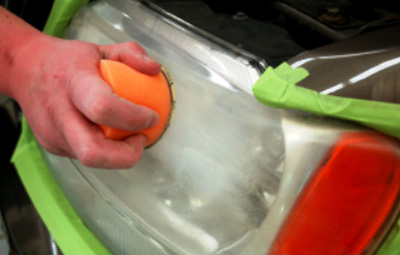
Step 4 –Make Sure Yellow Surface Film is Removed
- Wipe off the lens and inspect to ensure all the yellowing has been completely removed. If yellowing or portions of the surface layer still exist, continue sanding with a Gold 500 Grit Sandpaper Disc until the yellow layer of film is completely removed.
- The lens should have a white, evenly sanded surface that appears to look “frosted.”If any portion of the lens looks clear, glossy, or uneven; continue sanding before moving to the next step.
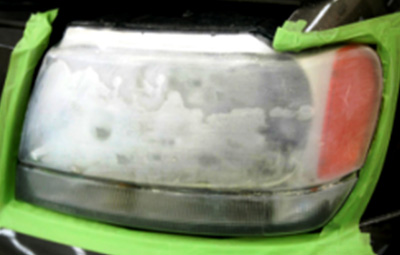
Uneven, some glossy and clear spots. Continue sanding.
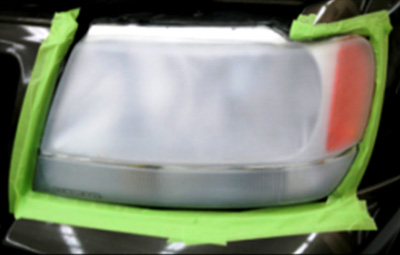
Very even, frosted surface. Continue to the next step.
Step 5 – Attach 800 Grit Sandpaper Disc to Pad
- Remove the Gold 500 Grit Sandpaper Disc.
- Attach and center a White 800 Grit Sandpaper Disc to the Orange Foam Pad. These are the white sanding discs with purple printing on the back.
Please Note: There are a total of four (4) White 800 Grit Sandpaper Discs that come with the kit.
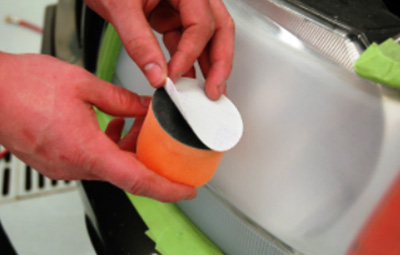
Step 6 – Start Sanding Headlight Lens with 800 Grit Disc
- Using medium to high pressure, begin sanding the lens with the White 800 Grit Sandpaper Disc and Orange Foam Pad.
- The goal here is to reduce the size of the sanding scratches from 500 Grit to 800 Grit.
- Frequently wipe the sanding disc and headlight lens with a paper towel or cloth to remove excess sanding dust.
- If the disc is no longer removing material, replace with a new White 800 Grit Sandpaper Disc and continue sanding.
- Make several passes over the entire lens to be sure the sanding scratches from the previous sanding step (500 Grit) are reduced to finer scratches (800 Grit). Once complete, move to Step 7.
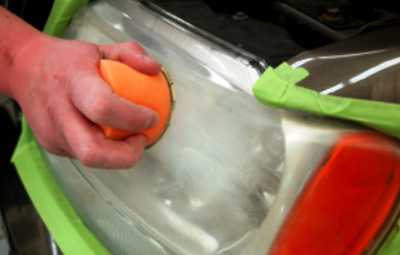
Step 7 – Attach 1000 Grit Sandpaper Disc to Pad
- Remove the White 800 Grit Sandpaper Disc and replace with a Green/Gray 1000 Grit Sandpaper Disc.
- There are two Green/Gray Discs – one says P1000 grit on the back of the disc and the other says P3000 grit (please see picture below).
Please Note: There is only one (1) Green/Gray 1000 Grit Sandpaper Disc that comes with the kit.
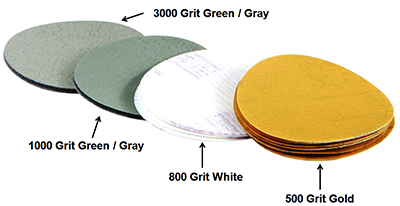
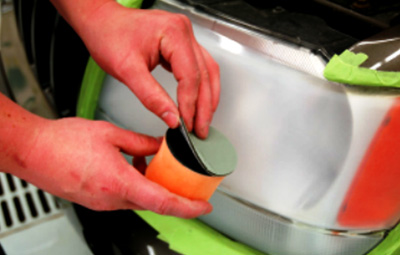
Step 8 – Apply Water to the Surface of Sanding Disc and Lens
- Using a spray bottle, apply enough water to dampen the Green/Gray 1000 Grit Sandpaper Disc and the surface of the lens before sanding.
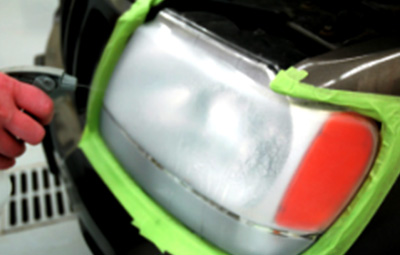
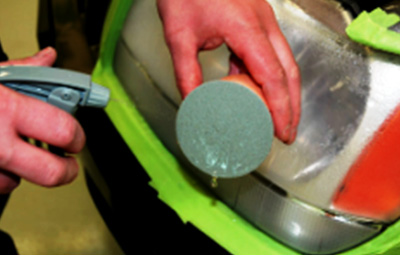
Step 9 – Start Sanding Headlight Lens with 1000 Grit Disc
- Using medium to high pressure, begin wet sanding to reduce the White 800 Grit Sandpaper Disc sanding scratches with the Green/Gray 1000 Grit Sandpaper Disc.
- Add a mist of water to the surface if it becomes dry while sanding.
- Make several passes on the surface of the lens.
- Avoid sharp edges or alignment pins on the lens to extend the life of the disc.
- While sanding, a white residual or slurry on the lens indicates you are reducing the sand scratches.
- Once finished, wipe the lens dry. You should notice that the scratches are much finer and the lens appears somewhat clear. If any coarse scratches are visible, mist the area with water again and continue sanding with the Green/Gray 1000 Grit Sandpaper Disc.
Helpful Tip: Extra sanding on this step will make the next step easier and improve the final clarity of the headlight lens.
Please Note: There is only one (1) Green/Gray 1000 Grit Sandpaper Disc that comes with the kit. You will use this one disc on both headlight lenses.
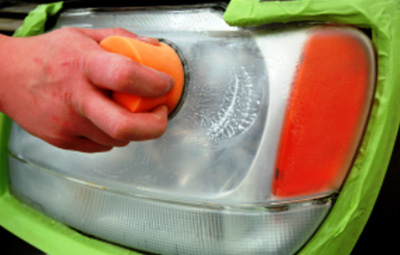
Step 10 – Attach 3000 Grit Sandpaper Disc to Pad
- Remove the Green/Gray 1000 Grit Sandpaper Disc and replace with a Green/Gray 3000 Grit Sandpaper Disc.
- There are two Green/Gray Discs – one says P1000 grit on the back of the disc and the other says P3000 grit.
Please Note: There is only one (1) Green/Gray 3000 Grit Sandpaper Disc that comes with the kit.
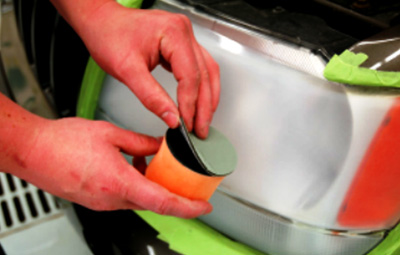
Step 11 – Apply Water to the Surface of Sanding Disc and Lens
- Using a spray bottle, apply enough water to dampen the Green/Gray 3000 Grit Sandpaper Disc and the surface of the lens before sanding.
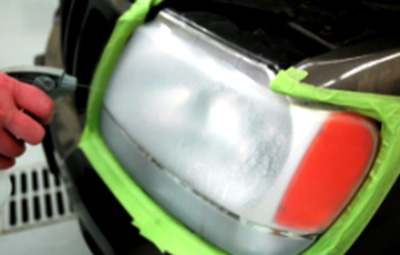
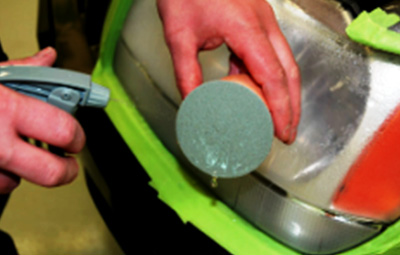
Step 12 – Start Sanding Headlight Lens with 3000 Grit Disc
- Using medium to high pressure, begin wet sanding to reduce the Green/Gray 1000 Grit Sandpaper Disc sanding scratches with the Green/Gray 3000 Grit Sandpaper Disc.
- Add a mist of water to the surface if it becomes dry while sanding.
- Make several passes on the surface of the lens.
- While sanding, a white residual or slurry on the lens indicates you are reducing the sand scratches.
Once finished, wipe the lens dry. You should notice that the scratches are much finer and the lens appears somewhat clear. If any coarse scratches are visible, mist the area with water again and continue sanding with the Green/Gray 3000 Grit Sandpaper Disc.
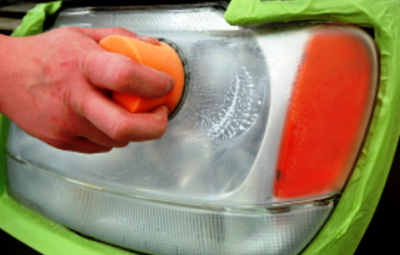
Step 13 – Start Rubbing the Lens with Rubbing Compound
- Remove the Green/Gray 1000 Grit Sandpaper Disc from the Orange Foam Pad.
- Flip the Orange Foam Pad over and use the opposite side (not the side with the black Hookit™ attachment) to polish out the remaining scratches.
- Dispense a quarter-sized amount of Rubbing Compound onto the Orange Foam Pad (as pictured right).
- Next, smear the Rubbing Compound around the surface of the headlight lens.
- Using high pressure, rub the surface of the lens to remove the sanding scratches.
- When the Orange Foam Pad becomes dry, add another quarter-sized amount of Rubbing Compound to the surface and continue rubbing the headlight lens until the sand scratches have been removed and the lens is clear.
- If additional clarity is needed or desired, add another quarter-size amount of Rubbing Compound and continue rubbing the headlight lens.
Helpful Tip: If sanding scratches are still visible on lens, repeat steps 10-13 to remove them.
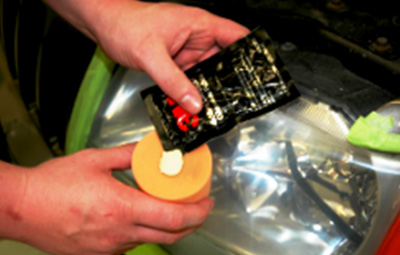
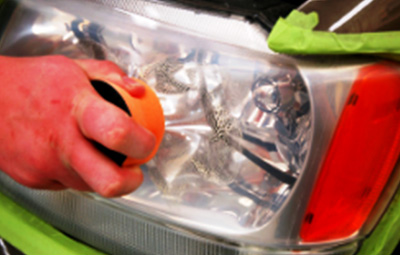
Step 14 – Remove Tape, Wipe with Micro Fiber Cloth
- Remove the Tape and wipe the headlight lens using a soft, clean Micro Fiber Cloth.
Helpful Tip: To keep your headlight lenses protected and looking clear, use Lens Polish & Protector and a Micro Fiber Cloth.
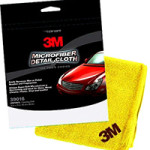
3M™ Micro Fiber Cloth 3M-39016
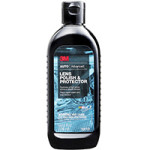
3M™ Lens Polish & Protector 3M-39010
Repairing major yellowing or haze with tools (drill or high speed buffer).
Step 1 – Clean Lens, Protect Adjacent Surfaces with Tape
- Clean the lens with soap and water.
- Protect trim and painted surfaces around the headlight lens with Tape. Damage can occur (scratches) if these surfaces are not protected.
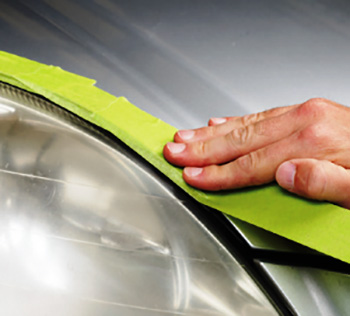
Step 2 – Sand to Remove Yellowing and Defects
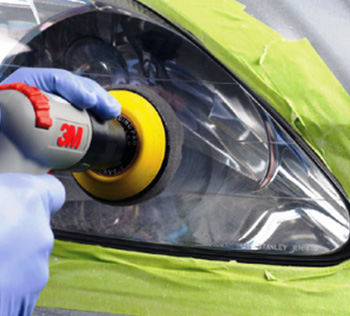
- Use a Drill with a 3 Inch Disc Pad Holder or DA Sander with a 3 Inch Disc Pad Holder to sand the lens using Gold 500 Grit Sandpaper Discs.
- Completely remove any yellowing and/or surface defects from the surface of the lens.
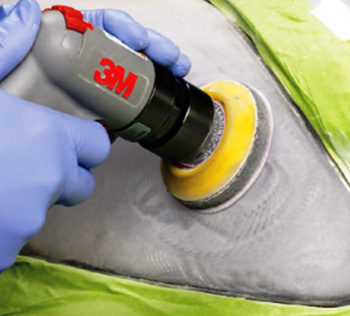
Step 3 – Reduce 500 Grit Scratch to 800 Grit Scratch
- Reduce the Gold 500 Grit Sandpaper Disc scratches with a Gold 800 Grit Sandpaper Disc.
- Wipe the headlight lens clean.
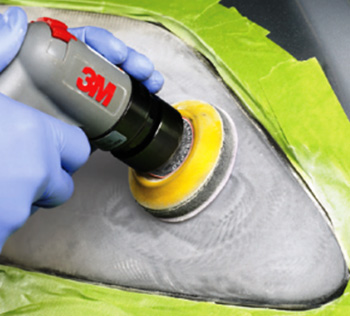
Step 4 – Reduce 800 Grit Scratch to 1000 Grit Scratch
- Reduce the Gold 800 Grit Sandpaper Disc scratches with a Gold 1000 Grit Sandpaper Disc.
- Use water to lubricate the Gold 1000 Grit Sandpaper Disc.
- Spend extra time on this step to ensure removal of all Gold 800 Grit Sandpaper Disc
- Wipe the headlight lens clean.
Helpful Tip: Use a Spray Bottle to mist water onto both the surface of the headlight lens and the Gold 1000 Grit Sandpaper Disc. Mist often to keep both surfaces lubricated.
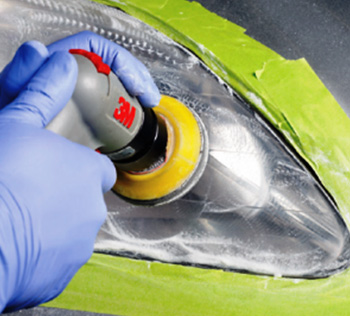
Step 5 – Reduce 1000 Grit Scratch to 3000 Grit Scratch
- Reduce the Gold 1000 Grit Sandpaper Disc scratches with a Gold 3000 Grit Sandpaper Disc.
- Use water to lubricate the Gold 3000 Grit Sandpaper Disc.
- Spend extra time on this step to ensure removal of all Gold 1000 Grit Sandpaper Disc
- Wipe the headlight lens clean.
Helpful Tip: Use a Spray Bottle to mist water onto both the surface of the headlight lens and the Gold 3000 Grit Sandpaper Disc. Mist often to keep both surfaces lubricated.
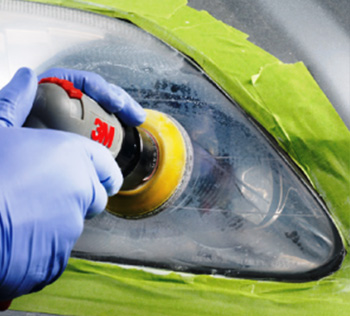
Step 6 – Start Rubbing the Lens with Rubbing Compound
- Use Rubbing Compound to completely remove the Gold 3000 Grit Sandpaper Disc scratches with a Drill and 3 Inch Disc Pad Holder or DA Sander and 3 Inch Disc Pad Holder, 3 Inch Foam Purple Compounding Pad, and Rubbing Compound.
- Wipe the headlight lens with a clean Micro Fiber Cloth.
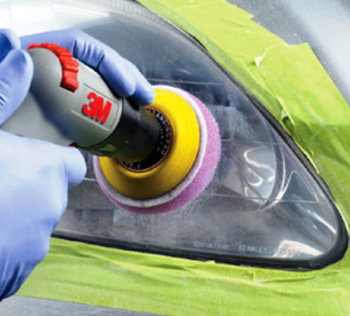
Step 7 – Start Polishing the Lens with Polishing Compound
- Use Polishing Compound with a Drill and 3 Inch Disc Pad Holder or DA Sander and 3 Inch Disc Pad Holder, and 3 Inch Foam Black Compounding Pad to polish the lens to a crystal clear, scratch free finish.
- Remove Tape and wipe the headlight lens with a clean Micro Fiber Cloth.
Helpful Tip: To keep your headlight lenses protected and looking clear, use Lens Polish & Protector and a Micro Fiber Cloth.
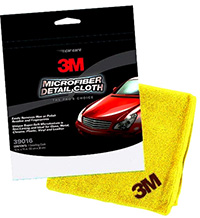
3M™ Micro Fiber Cloth 3M-39016
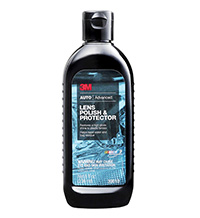
3M™ Lens Polish & Protector 3M-39010
Please be Advised
The recommendations and process steps listed in the projects below are general do-it-yourself recommendations that are designed to produce a successful project. Due to the many variables involved with each project and process steps, Touch Up Zone cannot guarantee results and does not accept liability for incorrect product application or use.
Before you Start
- Always wear proper safety protection: Safety Glasses, Respirator, Particle Mask, Latex or Nitrile Gloves and Hearing Protection (if you are using power tools that emit high noise levels).
- Utilize a well ventilated area when spraying coatings or sanding.
- Make sure the temperature is warm enough to allow coatings and materials to dry properly.
- Work in a well lighted area where you can clearly see what you are doing.
- Always follow label instructions on products.
Tools, Equipment, Paint and Material Options
The Tools, Equipment, Paint and Materials recommended for the each project are listed in the repair procedure and are highlighted in Red. You can purchase the Tools, Equipment, Paint and Materials for these products by clicking on the button below. For product definitions and general tech tips click here.


